Sunday, June 28, 2009

More Taping

The rest of the front area is taped except for the feared front bulkhead mentioned by Jim in his comment to my last post. Join area in the main cabin is prepared. There are small uneven areas along the join. I fill those with putty that is not allowed to fully cure before taping.


I also prepared the first bow foam layer, made in three parts. Thermo formed to fit hull shape.

Unidirectional carbon in the recessed area of the aft cabin bulkhead.

Now main cabin deck join and daggerboard to deck join taped


Foam glued in, kept in place with temporary screws.


After all the internal taping is done, most of what is left is in the aft cabin, I will continue with laminating all the internal local reinforcement areas and then the rest of the interior panels.

Tuesday, June 23, 2009

Taping the bow internally

This is quite certainly the most difficult taping I have done so far on this project. The space and access is very limited, but I think I ended up with a satisfactory result. The bob stay anchor and all the taping in the front compartment is finished, the rest of the taping will be a walk in the park compared to this.

Internal bow area, bow web at top of picture, keel line in the bottom. Parts of the front bunk at the left. The internal parts of the bob stay anchor also visible.


Front bunk front bulkhead and keel line taping.


External view of the bow area, showing the integrated carbon bow web and bob stay anchor in the bow template.

Thursday, June 18, 2009

Mile stone: Joining main hull halves

Not many pictures since the last update. Anyway, I have removed a lot of peel ply, pre-fitted the last bulkheads with a hot glue gun and lifted the port hull half off again. It's easy to lift one half single-handed and put a few pieces of scrap wood in between.


Then I filled and taped most of the the bulkhead joins. It is a bit demanding, but not impossible, to enter the aft cabin under the cockpit floor when the boat is on it's side.

Then Guttorm came by in my workshop and he was willing to lend me a couple of hands for a while so we decided to glue the two pieces together. We applied glue to the join surface and lifted the port half back down. Then worked a bit on the fine alignment, clamped all bulkhead joins and strapped the two halves together with four "jekkestropper" (straps used to secure cargo, equipped with a tightening ratchet) and finally removed all excess glue. Now the heat is on and it will be exciting to see how many clamps and pieces of wood and MDF we have managed to irreversible attach to the construction......

Here a top view of the cockpit, aft to the left.


After joining


Sunday, June 14, 2009

More preparations

I made holes for ventilation hatches in the anchor well.

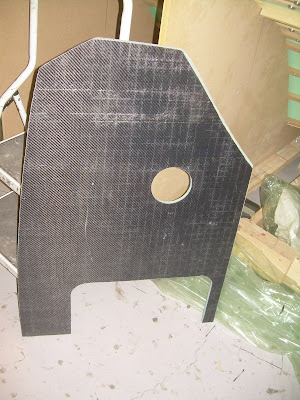
And in the aft cabin front bulkhead. I also made the cut out for half the aft cabin entrance hatch.

And I started to back fill all the cut out edges.

This is the Bomar aft cabin entrance hatch, 47cm x 47 cm, this was the closest I got to the specified measures. I will have to mount it with the hinges at the side.

Then I tacked the cockpit floor in..


.. and taped a few joins.

I still have to make the aft bunk top. I started out tonight by cutting the foam roughly from the mould used for making the glueing flanges. I plan to pre fit the foam blank when I lower the port half again and then remove it in order to infuse it, mount the inspection hatch and put it back inside the aft cabin before hull joining. The bunk top is too big to fit the openings after hull join.


I also pre fitted some more foam in the bow area. I try to do as much as possible before joining the hull as after that it will be a lot of time consuming crawling in and out of the hull, as the companionway is quite awkward to enter with my relatively short legs when hull is on its side.

Next steps will probably be to lower the port half and fit the aft cabin front bulkhead, and some more taping. Then pre-fit the aft bunk top, remove peel ply from taping areas and make the necessary markings before lifting up again. After the bunk top is laminated and placed back in the hull it can be joined, hopefully during this week.

I also decided on using a LINK SP II total hip replacement for the mast foot ball and cup. This is high quality CoCrMo ball and UHMW polyethylene cup. I could even consider using a highly x-linked polyethylene cup, but this is not as readily available without paying a fortune.

Thursday, June 11, 2009

Preparing for hull join

I laminated all the remaining join reinforcements to the dagger board case. Then I used this set up to make the keel insert. Then cut the slot in the insert for the dagger board.

Builder's tip: I did not clamp the case against a flat surface during joining. This resulted in an approximately 4mm twist in the case. This was quite easy to correct when glueing the case into the hull half, but it would of course be better to avoid.


I put the port half on top again to pre-fit the bob stay anchor, bulkheads and daggerboard case.


Glued in the internal foam strips in the bow area.

Made the hull cut backs for the dagger board case

Glued in the aft bunk bulkhead


Dagger board case with 4 mm twist being pre-fitted.


And then I glued in the dagger board case. This picture also shows the cut out in the keel insert. I glued the keel side one day, then at the deck the next day, in order to be able to correct the twist mentioned above.


Then I made the aft bunk glueing flange.


Still a lot of small things to do before joining. I also ordered more epoxy, peel ply and inspection hatches, as well as I bought Bomar deck hatches for the deck and aft cabin.

Saturday, June 06, 2009

Dagger board case: Cheek block and joining

Cheek block temporarily attached. Then I drilled and tapped the remaining holes.


Tools for cutting screws in exact length in order to use cap nuts as they are more "skin-friendly" than regular screw ends.


Studs attached, trial fitting.


Checking length of screws


Screw final attachement, bedded in sealer


And cheek block placed in the rope channel


Cheek block assembly temporarily attached on the rope channel, external view. Still need to anodize the aluminium and then seal between the case and al plate.


Using wooden spacers and several vices, the two halves were lined up ready for joining.

In order to be able to handle the case easily when taping all the join reinforcements, I decided to patch it together using several small pieces of 200g fabric. The peel ply leaves a very nice surface when removed, ready for further taping with minimal preparations.


Curing, getting ready for final laminations.

Tuesday, June 02, 2009

Dagger board case: Copper coating

I applied one.....

..and then another...


...and a third layer. Now concentrating on the lower part that will be immersed.


Late in the evening the fourth "wet on tacky" layer was applied, exclusively below the water line.

Monday, June 01, 2009

Dagger board case: Bottom flange and trimming

This is the setup for glueing the bottom flanges to the two daggerboard case halves.


Detail of the laminate quality showing the flange for taping. Mould plate covered with packaging tape.


Finished bottom flanges. No vacuum here, just wet lay up and peel ply.


Trimming the sides using a router. I made a "plug" to fill in the case inside and routed back 12 mm from the top of this one to get the correct length of the sides.


Cut out for cheek block made, trimmed and sanded, ready for dewaxing and four layers of Copper Coat