Tuesday, February 28, 2012

Paint

After filling a lot of small imperfections I had to sand down the parts again.


Then another sprayed layer of high build epoxy primer


This was then sanded down with a random orbital sander using 240 grit paper. Before this point, I have only used a rigid long board for sanding, I think this gives the best control of the contour of the parts.

Guttorm, my "landlord" and sail trimmer, inspecting the result.  For size comparison, he is a relatively big guy at 6'8" (204 cm).  The daggerboard just visible in the far end of the paint booth.  The pop top, bow pole and mast support was sent to the paint shop for painting later this week.


A last shot of the yellow finish


I had an accident during the final preparations for painting and the pilots that I had tread for the halyards was ripped off and lost into the mast.  So now I will have an excellent opportunity to work out the best technique for treading halyards trough the mast.  Suggestions appreciated.

Friday, February 24, 2012

Primer

More wet sanding and epoxy coating of the daggerboard


The details of the mast.  Trying to make acceptable standard of finish around halyard exits and carbon fibre tangs


Finishing the trailing edge. Preparing to be suspended from the ceiling.


Primer.  First coat sprayed tonight.  And just as I suspected, this revealed a few dings and scratches that I will fill prior to sanding this layer down.  Then primer again, until acceptable finish.


Monday, February 20, 2012

Progress

One of the things this last week has been the pop top modification.  A foam cowling was made and fitted.


It was carved out inside and laminated


The outside was laminated


And covered in fairing compound


The contouring of the mast turned out to be a much bigger job than expected.  After three times filling the recessed area it is still not perfect, but I'm getting there.  I spent two sessions in the workshop each day and are about to put a substantial amount of time into this finishing work.

This is port side of mast, continued from previous post.  I put the big fill on too soon and had to refill a couple of times.


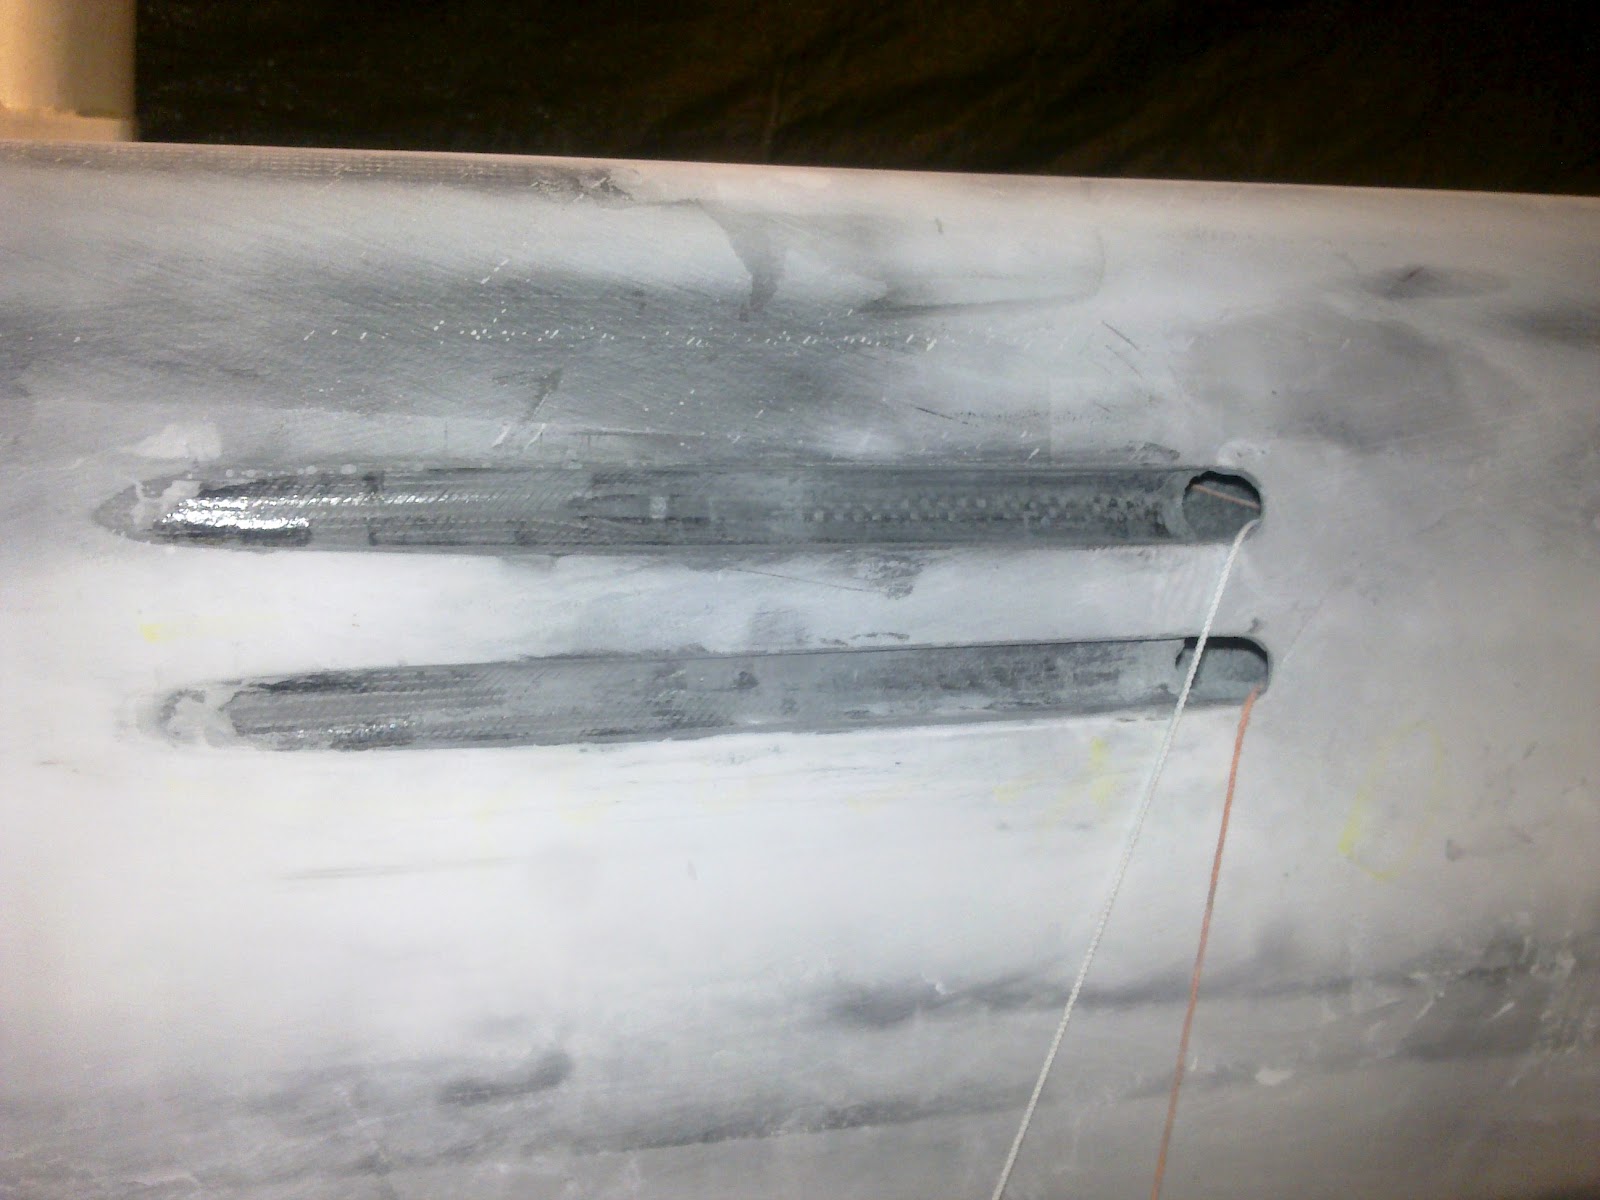
Low areas marked, ready for the, so far, last fill.  I haver not yet sanded these fillings down as I progressed to starboard side.


On starboard side I did fill the low areas three times, sanding between each layer to get the idea how much more was needed.  I think a combination of the putty shrinking when curing and the fact that the fill should be convex has made this a bigger challenge than expected.


Yesterday the big fill went on.


Now sanded to 80 grit, continuing on the other side tomorrow


Then there will be the leading edge, and the fine work on all halyard exits etc before spraying epoxy primer.

I have also worked on making the bow pole and forward mast support ready for painting.


Then there is the daggerboard of course.  I have that one at home, working on it when I am not able to go to the workshop.  It will be really good.  Seems to be a tough one to get the fluorescent anti fouling though, received this e-mail from France today, from the only manufacturer of such paint that I have been able to find:

Dear Tor,

Thanks for your interest in Nautix product. Unfortunately we do not have a distributor in Norway and our product are not certified for reselling in Norway.

Our fluorescent antifouling in A9 T.SPEED in Europe and A4 T.SPEED in the UK. You can get it from us but freight cost will be very expensive or you can contact one of our distributor in the UK, in Germany or in Lettonia.

Best regards

CĂ©dric RAFIN
Export Zone Manager

NAUTIX SA

By the way, it seems that I have been misled to believe that the United Kingdom was a part of Europe, while this Frenchman clearly states that Europe and UK are two different markets... 

Tuesday, February 14, 2012

Foils

I've been working on foils lately.  The rudder is being wet sanded to fair the painted surface to perfection.  Also, when painting, the trailing edge got rounded off instead of the intended narrow square end.

The daggerboard only had some sprayed epoxy primer on it, and I applied a thin layer of fairing compound to the whole surface.  This has now been sanded back down.  The kevlar-hell raised again, of course; when you sand down over a kevlar fabric and come through the overlaying epoxy/fairing compound/whatever, the kevlar fibres will instantly rise and create something similar to a brush.  The only way to get this faired down again, in my experience, is to wet it in epoxy and sand it down with a very fine grit after curing. When at it, I just wiped the whole board in epoxy, and is now ready to wet sand this with a fine grit.


Finding a room where I can finish the mast has been a long time challenge.  The workshop is just too short, and a heated 11m long room seems to be rare in this area. Then Guttorm offered me to use one of his chicken houses, as this had no other occupants at the moment.  I could get a 3 or 4 times longer mast in there, but we closed off a corner to not have to heat the whole room.  So now I have a 3,5m by 15m room with a 65 kW heater.


I took off all the hardware and removed the halyards and shrouds and then sanded the whole section.  Most of it is just fine as it was made in moulds, but the join area needs some care.  Also, some epoxy edges were left from the edge of the vacuum bag used for the last lamination.  I follow the steps in the airplane fairing process I have linked to in the past, first filling the low areas.  I will now go back and do some cheese grating when the putty is still not fully cured, and cover with the big fill.


I will not try to get a piano finish on the mast, just make sure it has the surface of a quality air foil.

Wednesday, February 08, 2012

Decision. Finally. Hopefully a good one.

So, after years of speculating, after the last week's inputs from blog followers and an attempt to see it all with fresh eyes, I made a decision on where to put which holes in the boat.

The plotter will be in the starboard side main bulkhead.  Good point from Andrew with visibility on starboard tack, but just as important, it will not interfere with the cleat and screecher sheet from starboard winch to the same degree as it would on port side.

Compass will be in pop top aft edge.  This will place it as far away from metal parts as possible. It will also double as a lock for the companionway panels when the boat is locked off.  Also, I might be able to use one red led as light for the compass as well as for night light in the cabin (see trough compass).

The two Nexus instruments will be in the port side main bulkhead.  Whether these will be sitting side by side or vertical is not yet decided, I have to look closer at the cleat and sheet situation, but being two smaller units, it's much easier to get a good solution than with the rather large plotter unit.

Today I cut a hole in the pop top.  The removed area was the one damaged when a welding in the original aft mast support failed and the mast fell on the pop top.  The new aft mast support is quite a bit higher to accommodate my large mast section when raising, and it is much better welded.  The problem with it is that I didn't get the support until well after the brackets were fitted, and thus did I not have an instrument to make sure they (the brackets) were placed exactly parallel.  This makes it very tricky to remove as it jams in the brackets.
A vertical panel extension to make a large enough area to receive the compass was fitted using another panel off cut to align it.


This Silva Racing compass is the one responsible for all the discussions.  It is amazingly stable and also features a tactical scale to make it easier to catch wind shifts etc.


While waiting for liquid water it can be good to enjoy shots of another F-22R racing down under. 

Also recommended stimulation are the videos of full blooded big sister F-32SR Jailbreak during shakedown sailing in Florida.  Reaching in 5-8 knots windUpwind work in 7-10 knots wind. Pure trimaran porn, enjoy!

Saturday, February 04, 2012

Another step

After pulling the daggerboard from the moulds, I laminated the leading edge aramid strip and sprayed a litre of under coat.  Then went sailing.
As I'm not using gel coat, the surface tends to have areas of small voids, I have not found out how to avoid this.  It's time to get it all shiny.  The marks on the board shows it is 25 cm submerged when up.  I'll apply antifouling to the lower 30 I guess, and leave the rest with a bright colour, as specified in the ISAF regulations.
I also applied fairing compound to the forward mast support.


I cut and mounted the medium hard urethane rubber bumper stopper under the mast foot.  Now I won't have to be so careful when pulling up the daggerboard.


I also made the plastic strips that the pop top should slide on.  PE cutting board.  My pieces of UHMWPE was not long enough.


My smallest towing vehicle modified with F-22 pop top.


Preparing the pop top to accept instruments at the back end.  Then Andrew presented a Saturday lecture on electro magnetic physics, please see the comments on my previous post Electronics.  So I have to consider that yet again.


Contraryto the weather forecast, it's getting even colder.  So the daggerboard is sitting in front of the fire place keeping it self warm as the fairing compound hopefully will cure.


Friday, February 03, 2012

Small steps

After hauling the boat last fall, I put together a quick list of things that I wanted to do during winter.  It filled one page, and even though the boat can sail now, there sure are a lot of things to be sorted until it is like I want it.  Time has not been available in sufficient amounts, and the boat is not kept in a heated place, so the list will definitely still be substantial at next launch.


But I'm working on it.

Engine operation was awkward.  I'm modifying the engine bracket to improve handling.  This will also give the control wires a bit better life.  When this is done I will add a tiller-engine link to improve tight quarter manoeuvrability.  It seems impossible to use the same engine mount for the 2,5 hp.  I guess I will just have to race with the big one.

I also pulled out the daggerboard to finish the finishing work on that one.  There were a small bump along the leading edge from where the kevlar tape ended.  I suspect this was the source of the wonderful music appearing at about 14 kt boat speed. Now covered in fairing compound on one side.

Just started a lot of other small things as well.  Slow progress, fingers tend to fall off after short time working on the boat.  Hopefully we will see some less friggin' cold weather soon.